How to create an Alert in the Bitmovin Analytics dashboard
The alerts feature is currently only available as a beta. This means that for each organisation, users can only create a maximum of 4 alerts.
To create an alert, navigate to the Alerts section in the first level navigation of the Analytics dashboard.
The incidents list
The incidents list provides a summary of all active and past incidents that were triggered by a configured alert.
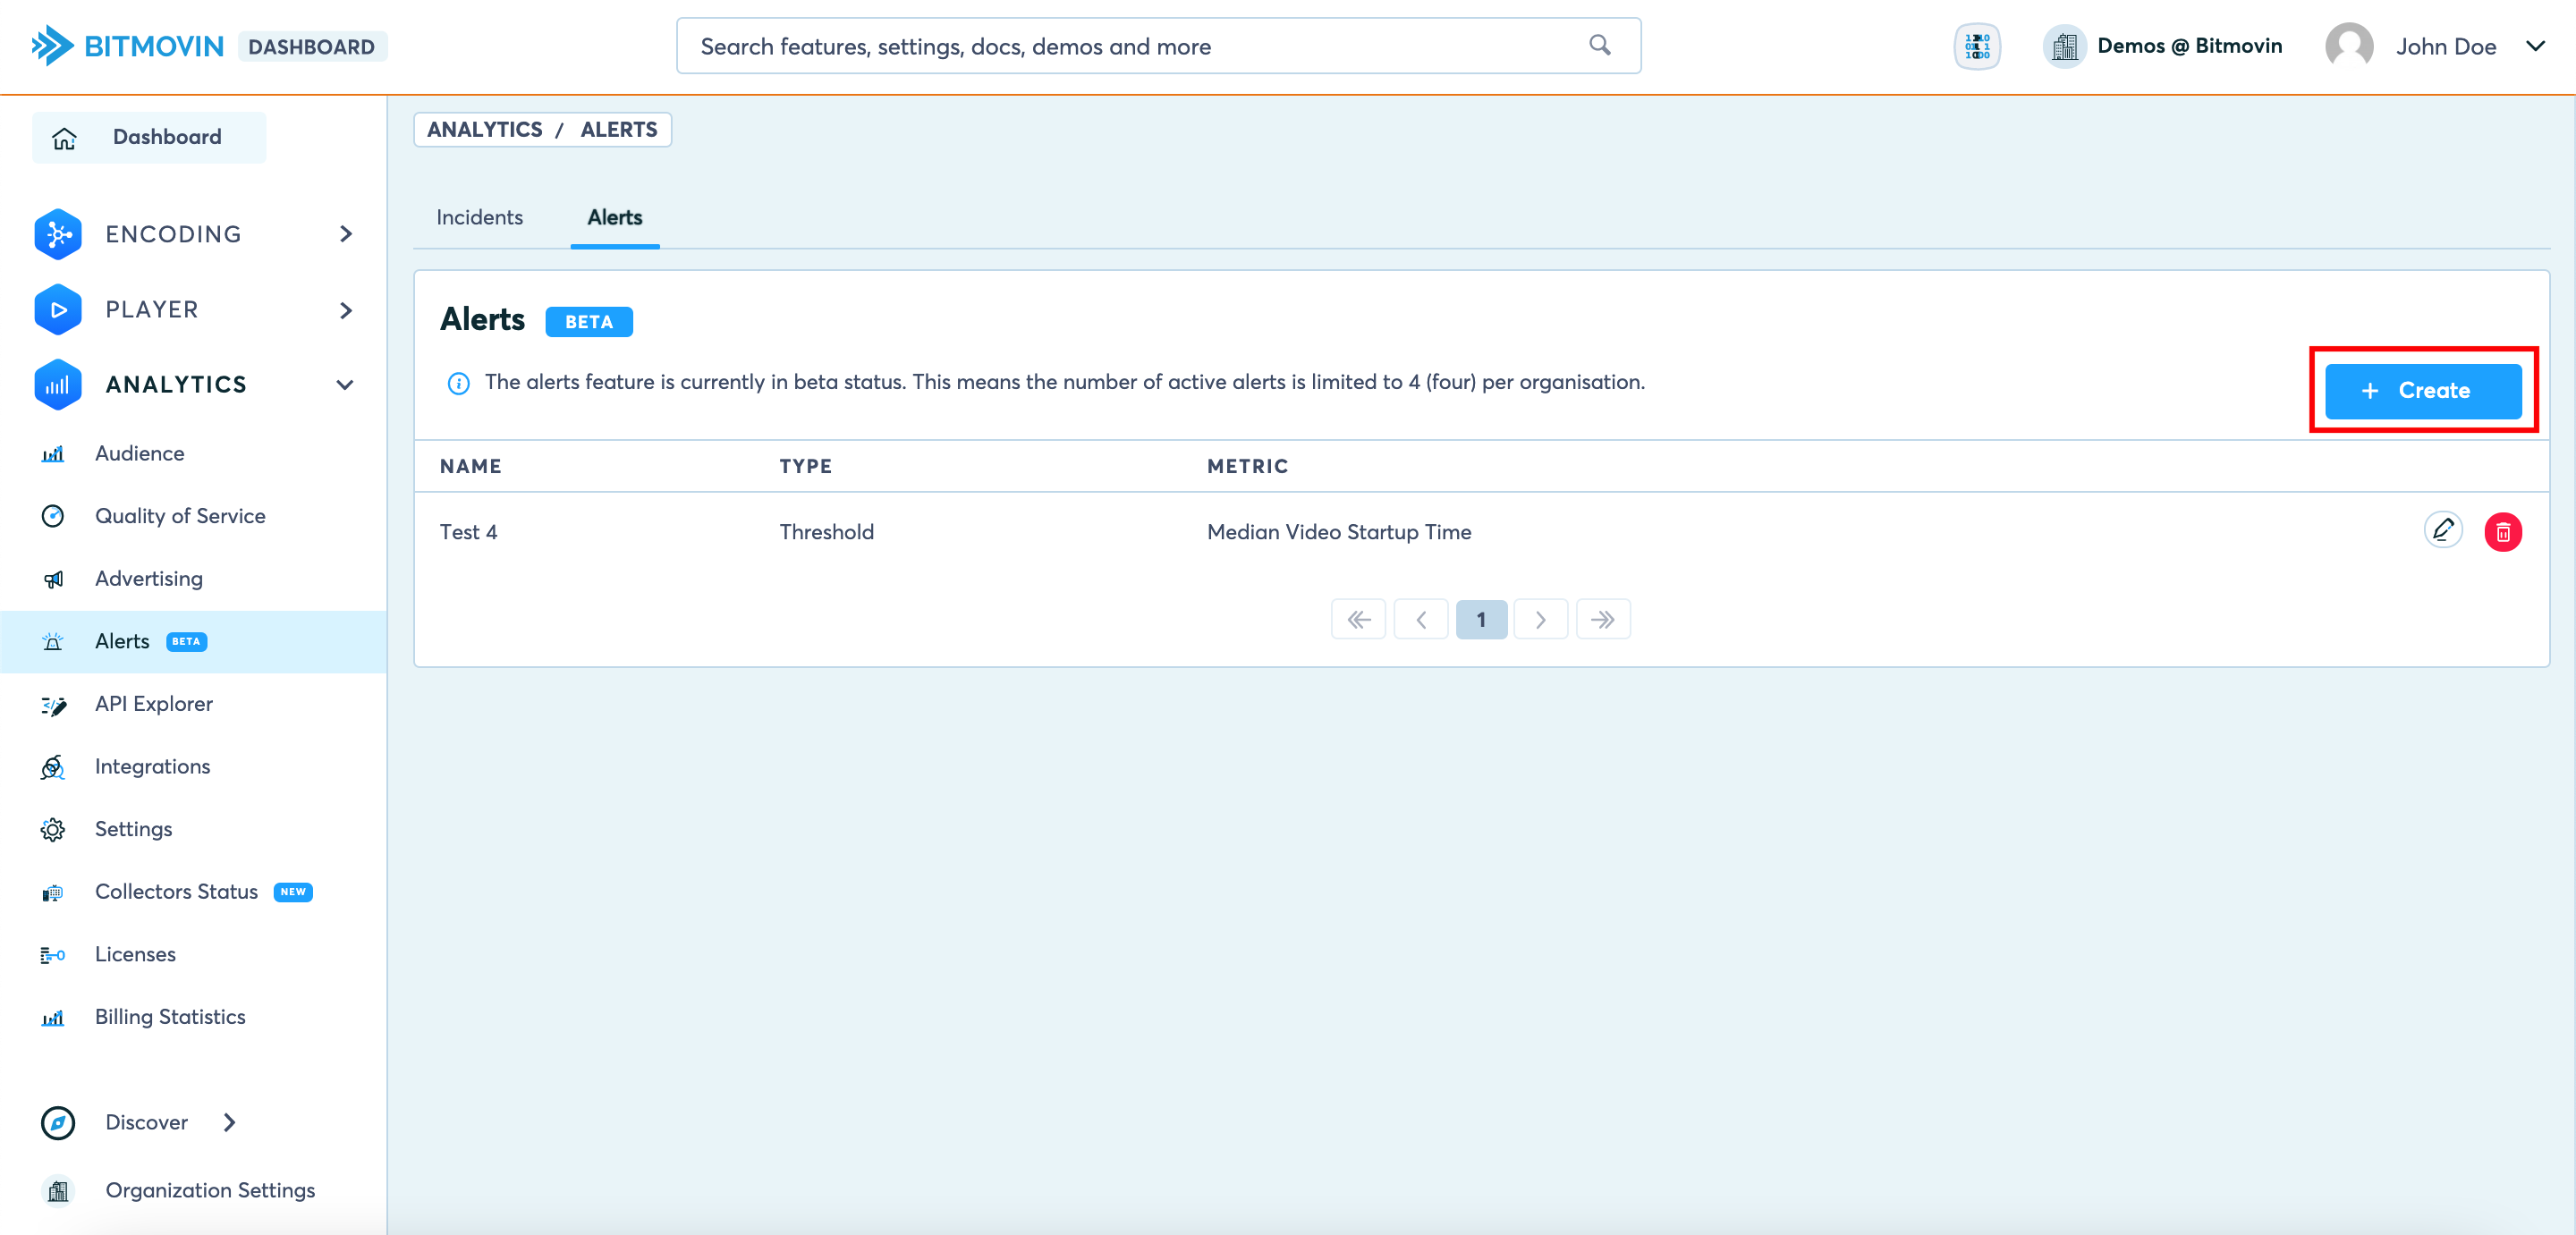
The alerts list
The Alerts List The alerts list provides a summary of all created alerts and allows users to edit and delete existing alerts. Via the Create alert button in the top right corner you can add another alert.
Creating an alert
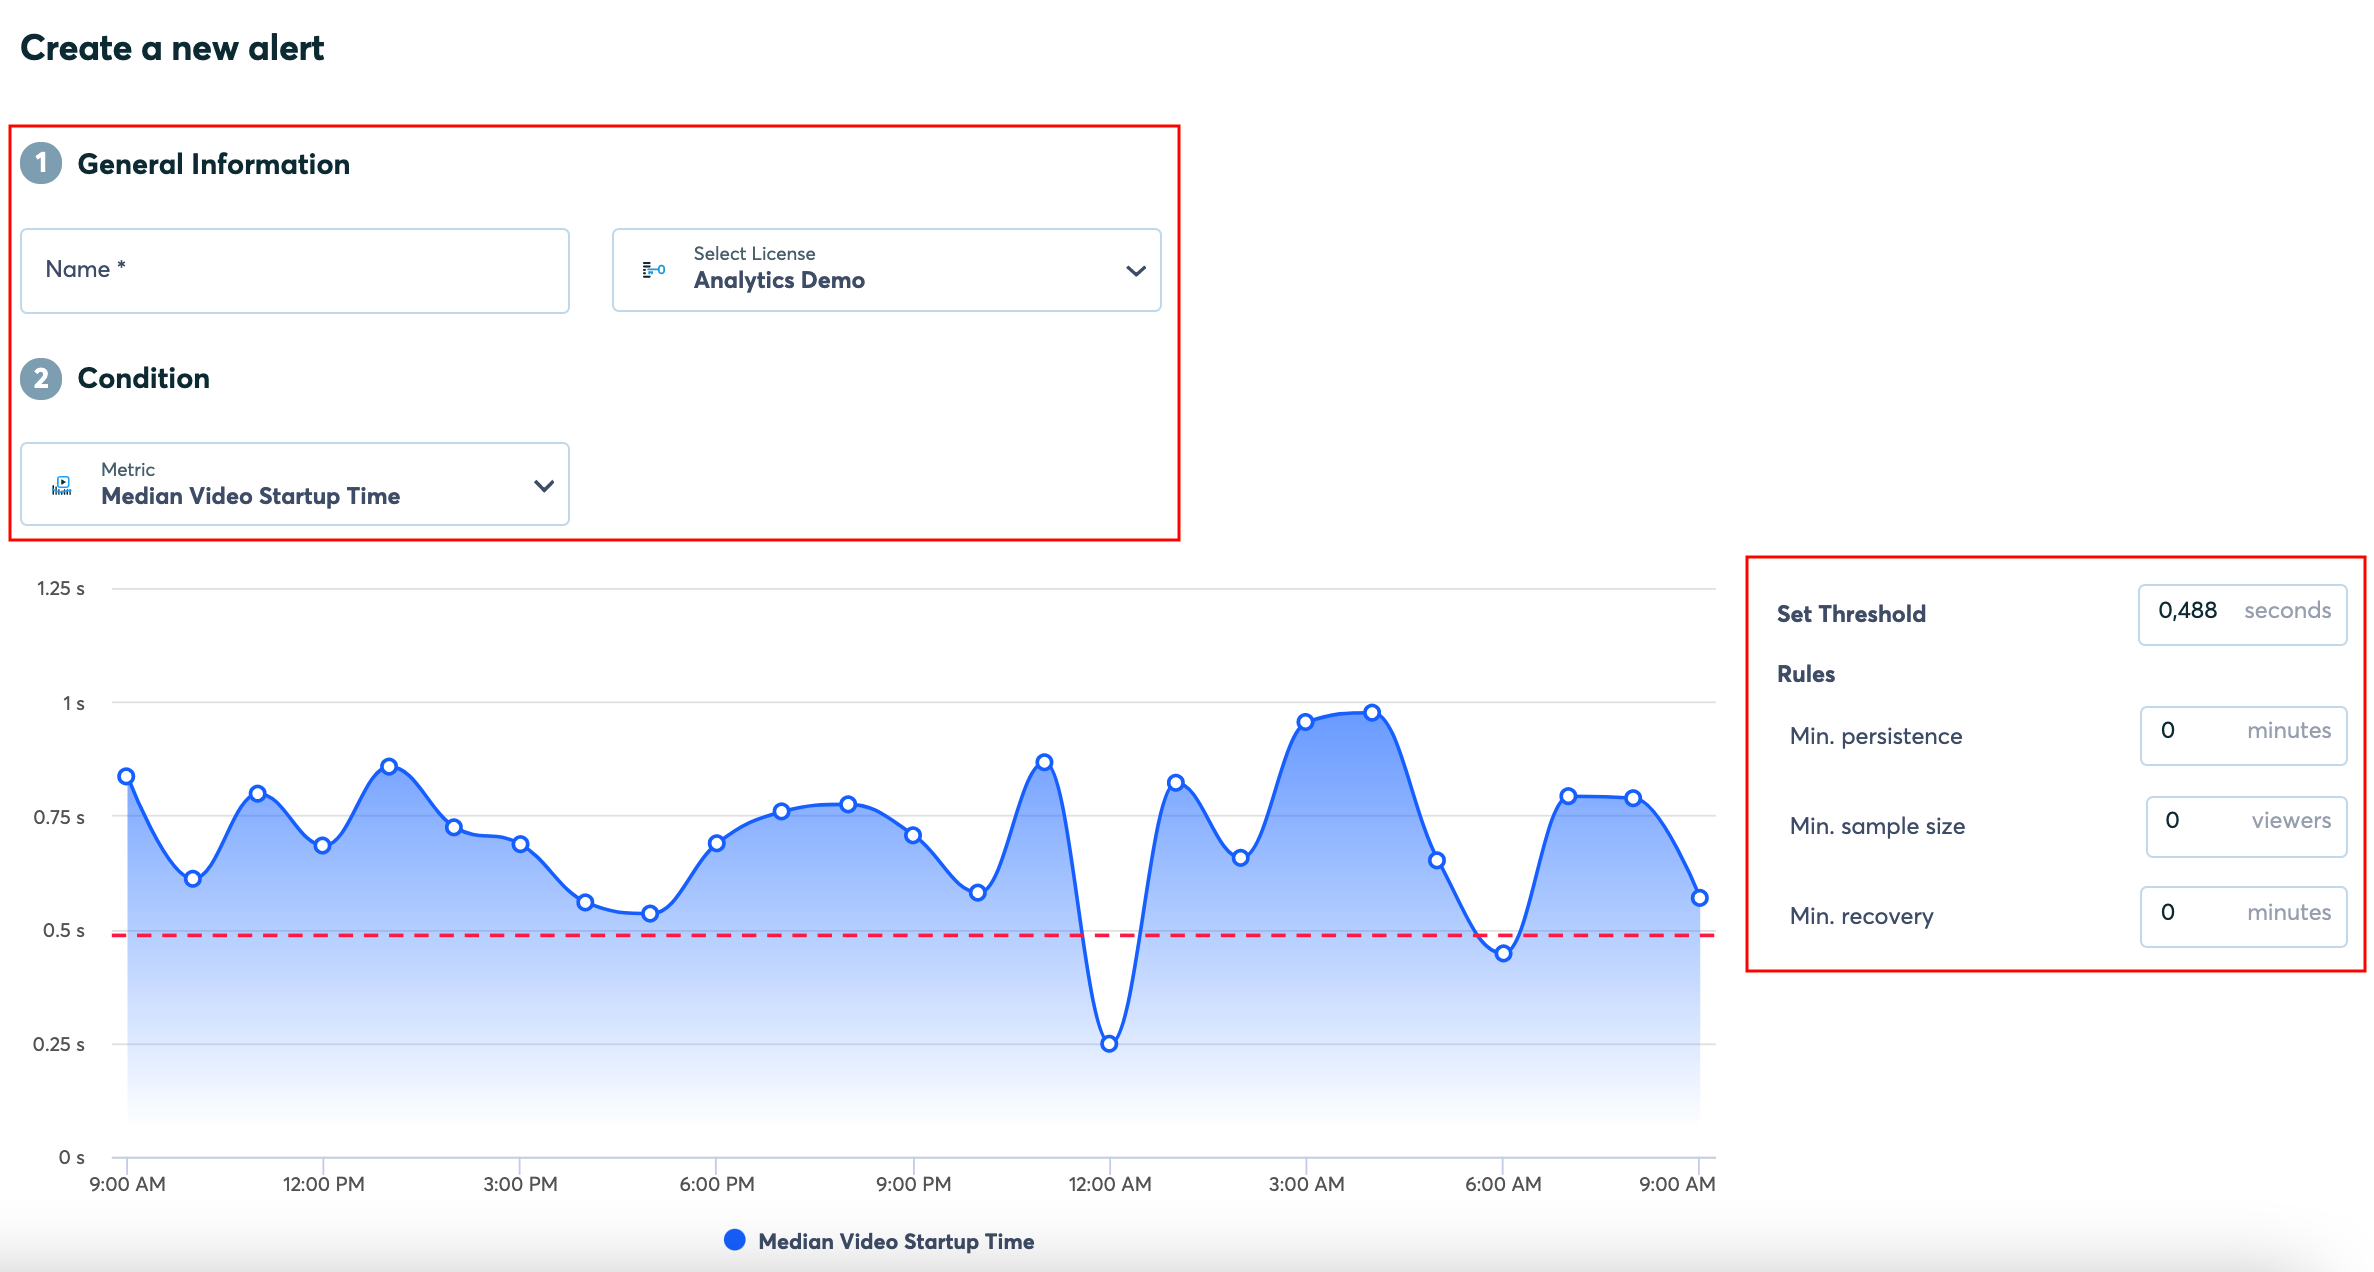
- First, give your alert a name, and select the license the alert should be configured for.
- After that, select a metric you want to set up an alert for
- The next step is to configure the conditions for an alert:
Threshold: Once this threshold has been reached an incident will be triggeredMin. Persistence: Defines for how long a metric has to be over the selected threshold before an incident is triggeredMin. sample size: Defines a minimum sample size of your user-base for which a metric has to be above the defined threshold in order for an incident to be triggeredMin. recovery: Defines the duration for which the metric has to remain below the defined threshold, for an incident to be considered resolved
Adding a notification channel

Add a notification channel There are two channel options available to add a notification to. Either a Microsoft Teams webhook, or a Slack webhook. Just select the messaging service you want your notifications to be sent to from the dropdown menu, and add the webhook URL in the dedicated field.
After that just press Save notification channel.
At last save the alert by clicking the Create button in the bottom right corner.
Updated 4 months ago